For the current shiny server we use rshiny proxy and version 2.5.0, i.e. shinyproxy-2.5.0.jar.
To access the VM apply for an account via the SPACe helpdesk.
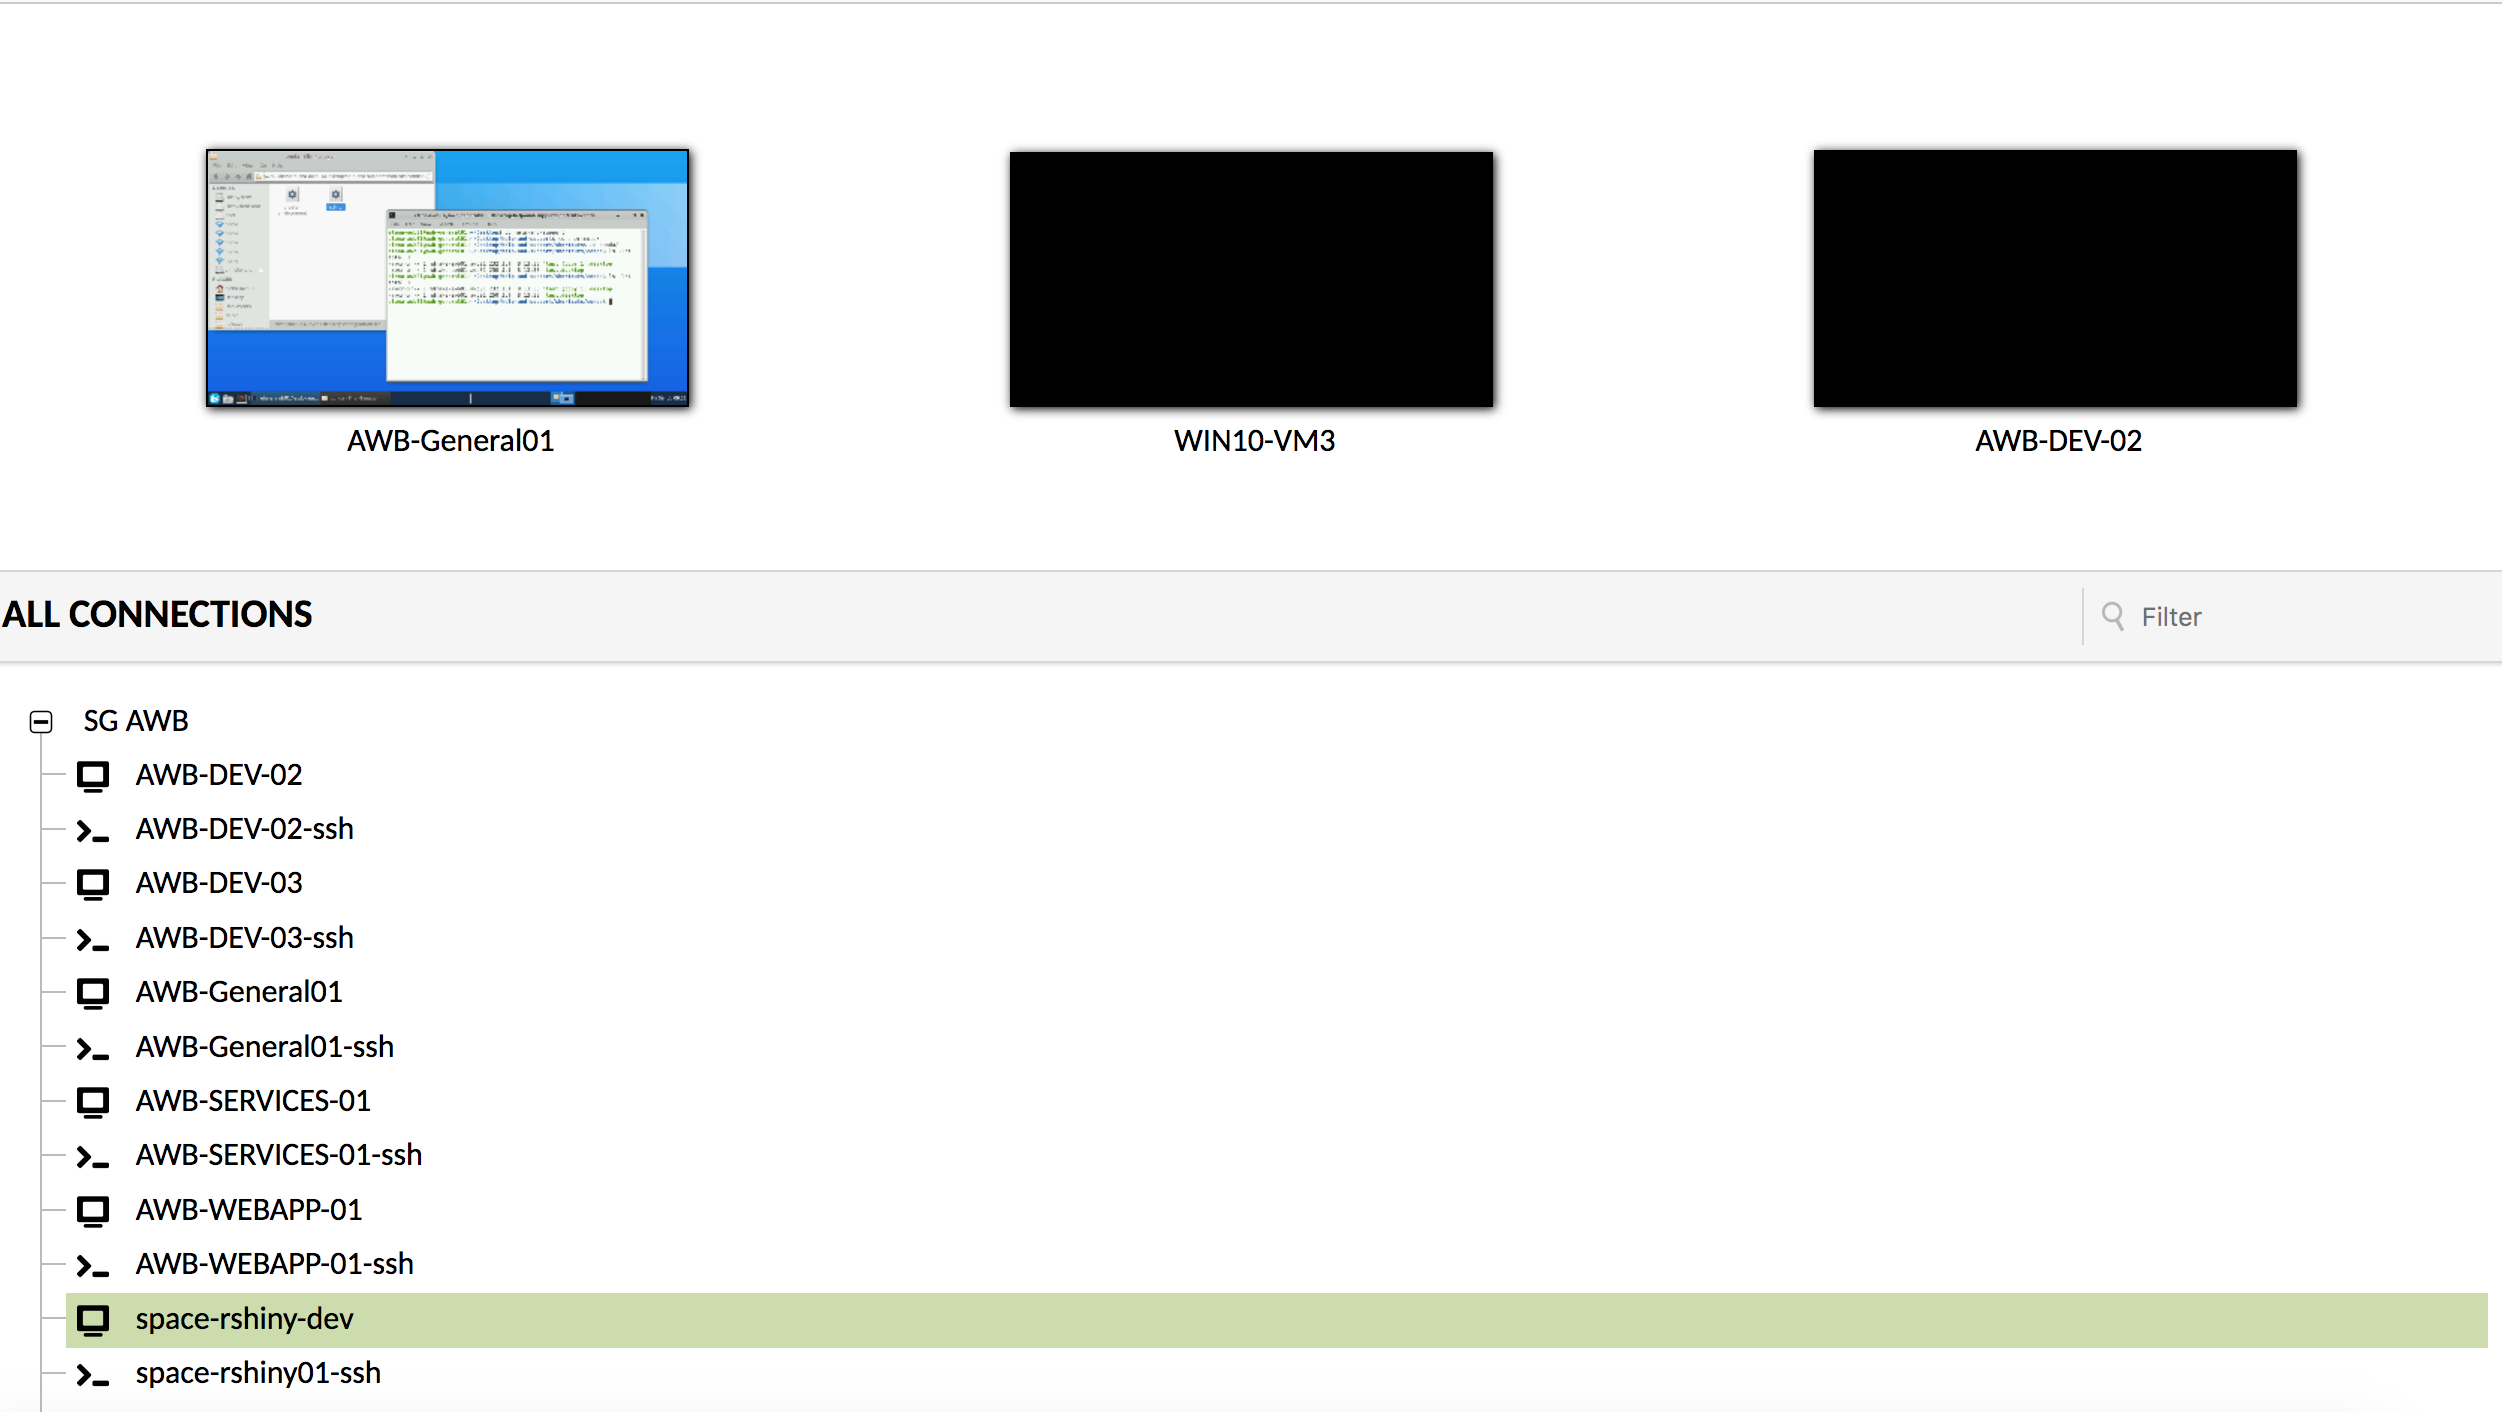
The VM can be accessed the same way as the other SPACe VM(s) in use for SPACe users and as described in the Analytical Workbench user guide. It is visible to you after logging onto the guacamole level. Its name is space-rshiny-dev.
Logging into an `rshiny-dev` session
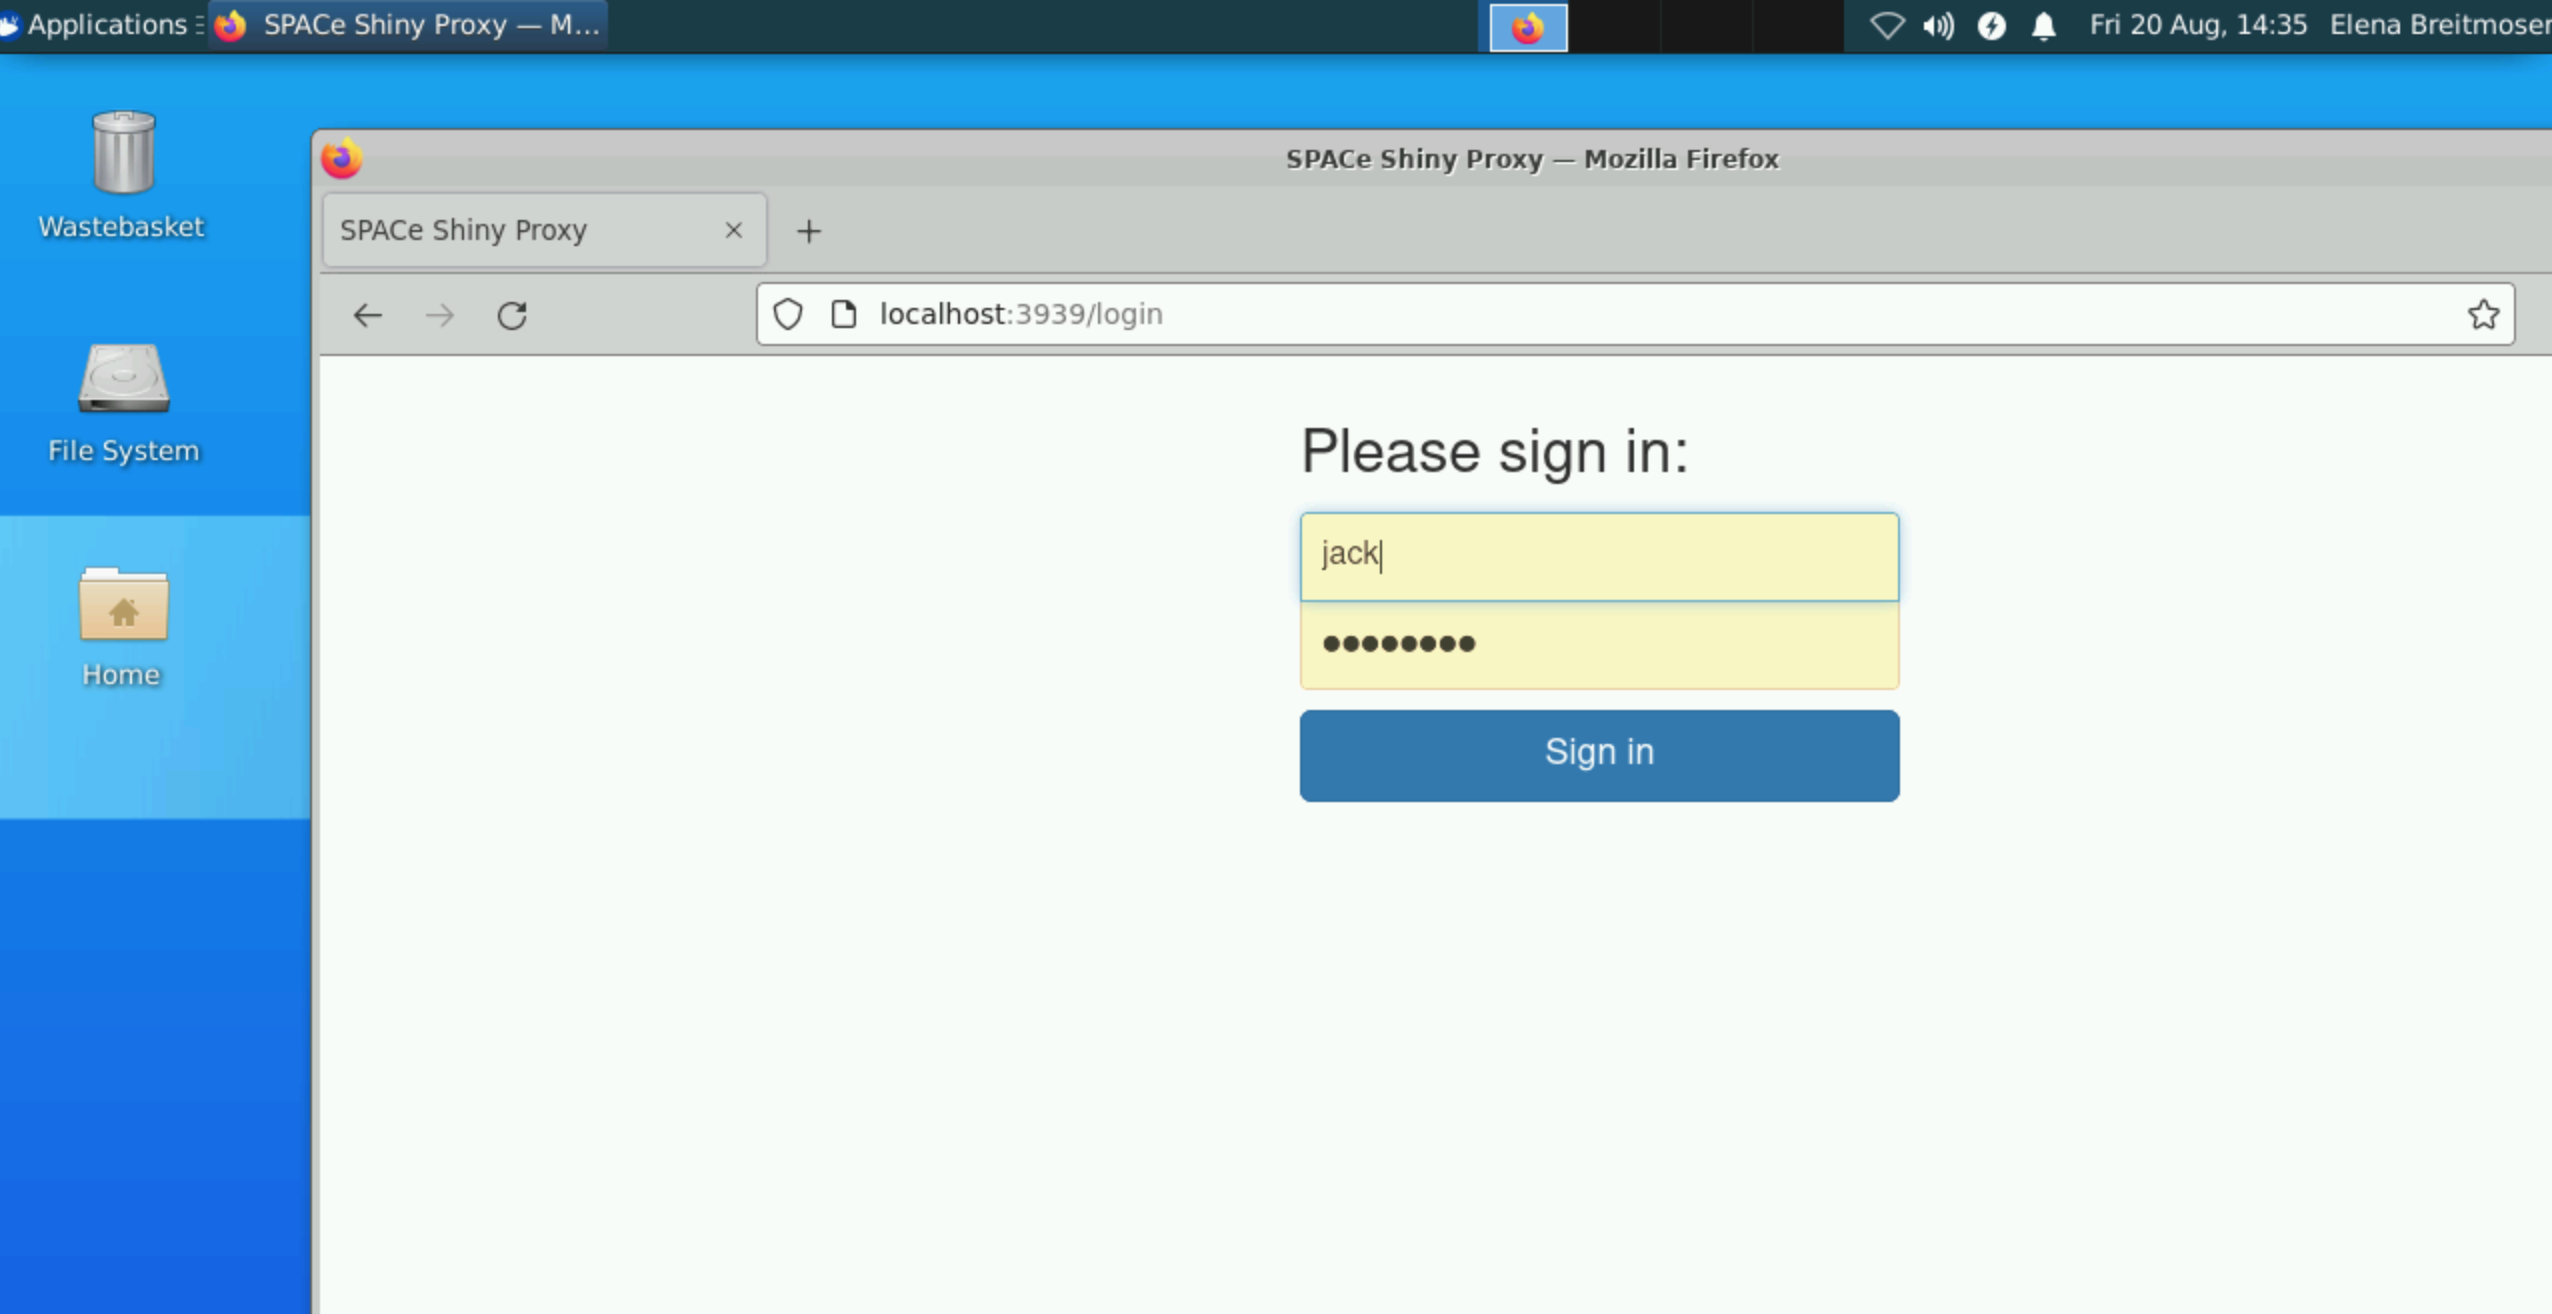
You also need to have a username and password to be able to access the website https://localhost:3939 to see how your app - once deployed - would look to the external user.
Accounts can be created by contacting the SPACe helpdesk.
Logging into an `rshiny-proxy`
Once you are logged onto the server:
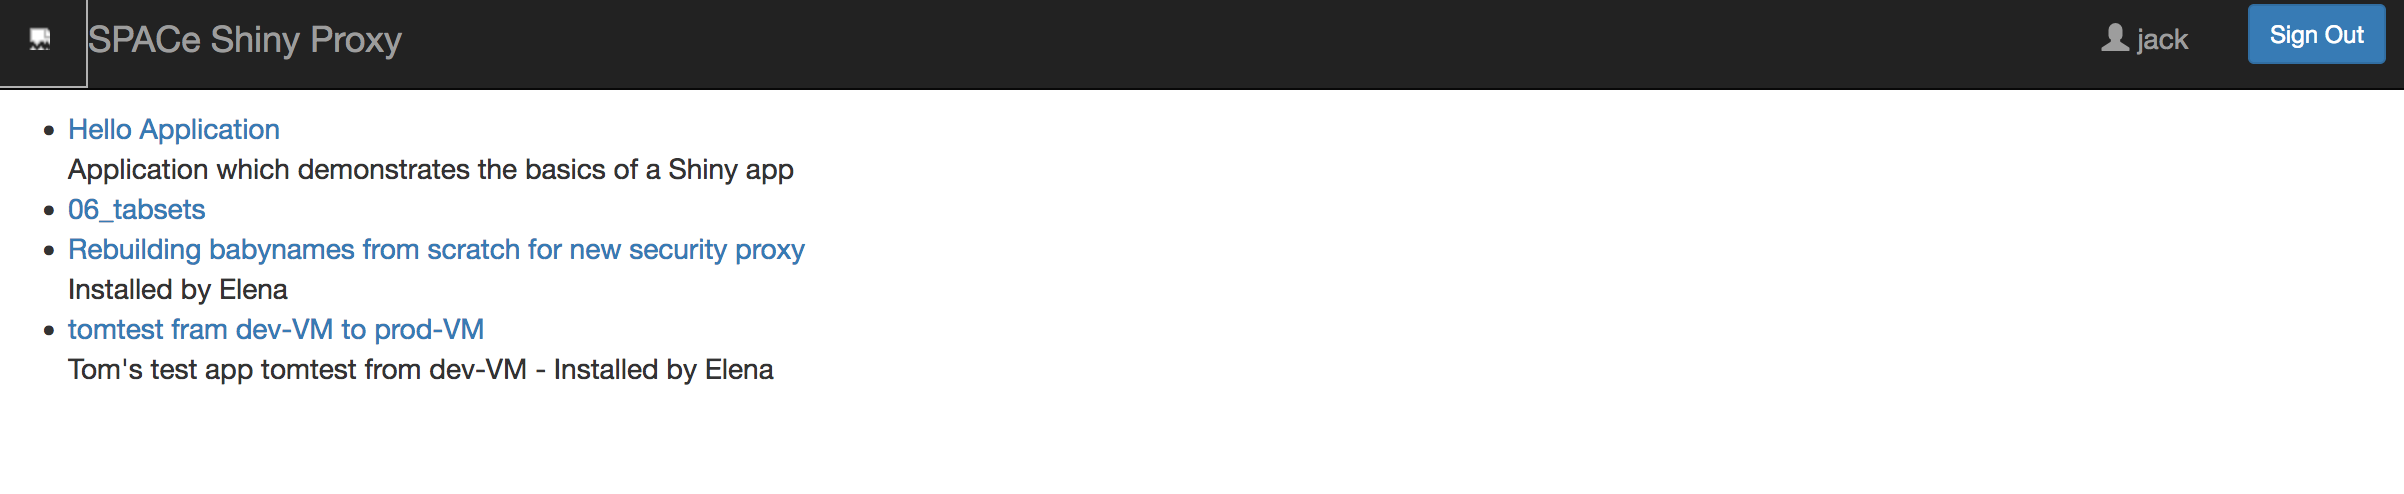
Clicking on the title bar 'SPACe Shiny Proxy' (in the example below), will always bring you back to the landing page, which shows you all the apps you can view.
It is essential that you have a ui.R and a server.R file for your app (see deploying apps). It is fine to have additional *.R-files, data, images, etc. as part of your app.
You can transfer this app to the dev-VM and the correct directory - as outlined below - while it is compressed, e.g. by using tar and zip/gzip or by e.g. cloning an existing git repository of yours.
If you are not used to the editors available on space-rshiny-dev, you may prefer to add and adapt the Dockerfile (see points 4. and 6. below) before you transfer everything to space-rshiny-dev. Note that the directory-level structure (the Dockerfile in relation to the app code) will be important on space-rshiny-dev (see points 2. to 5. below) so that you can build your app successfully.
Open a terminal window.
Go to your HOME directory /home/<username> using the cd command. That command brings you to your HOME directory. Use the command pwd to check which directory you are currently in.
Create a new directory with the name of the app myappname using the command mkdir myappname. You should now have a directory /home/<username>/myappname (please use lowercase names for these directories, the procedure is case sensitive!).
Copy the Dockerfile template into the directory /home/<username>/myappname (The spelling and use of upper/lowercase letters is crucial, so please call it exactly 'Dockerfile'! If you open this document within a browser launched from within the EIDF Service VDI you can directly copy and paste.) So now you have the following directories and files:
Copy the app myappname into the directory /home/<username>/myappname. Use ServU or git to transfer your app to the VM.
So, assuming the app name was shinyservertestapp the file structure would be:
Top level app folder
And the 'shinyservertestapp' directory could contain, for example:

Second level app folder
### Configuring Docker
Edit and adapt the Dockerfile template to be updated (Use e.g. 'emacs', 'vi' or 'nano' to edit the file) in `/home//myappname/`
a) Replace all occurrences of `myappname` with the name of your app, which should be identical to the directory it is in (lines 32, twice in line 33, 37)
b) Replace all occurrences of `` with your username (lines 31, 32, 33, 37).
c) Add all the packages your app requires to be installed, in the example below, the app `myappname` requires the packages 'dygraphs' and 'stringr'. (lines 25, 26)
### Running Docker
Bash
dockerbuild-tmyappname.|teeBuildOutput.txt
To build the docker image (**the first time you do this for a given app it might take a while and produce a lot of output on the command line**; so only include essential packages to the Dockerfile to save compilation time!).
The second part of the command `tee BuildOutput.txt` will write the output to the file BuildOutput.txt as well; this will make it easier to spot any error messages for (you and/or) the [SPACe helpdesk](../../contact.md) team in case there will be any.
You have to re-run this command any time you make changes to your app (i.e. the code) and want them to be deployed. You will see from the output when re-building it that it might use the build cache. Use `docker build --no-cache -t myappname .` to avoid this.
Run the command `groups` to see if `docker` is one of the groups you belong to
In case you haven't been added to the docker group you will get an error message, contact the [SPACe helpdesk](../../contact.md).
### Check your docker image
When the command completed successfully, you can check the new image `myappname` with the docker command `docker images`.
Another optional check to see if the docker image was built really successfully is to run
Bash
$run-p3838:3838"myappname"
from the command line. The output would either display an error message - or if successful:
Bash
...
Listeningonhttp://0.0.0.0:3838
(It is possible that the port 3838 is already used by another process, you would get a related error message, which would have nothing to do with the app not having built correctly, though. In this case you would have to ask the [SPACe helpdesk](../../contact.md) to run the command for you instead.)
Then - to see what your app would look like - open `localhost:3838` in a web browser on the dev-VM. If there are further errors they will be displayed on the command line from where you ran the docker image.
Have the new app added to the configuration file 'application.yml' by contacting the [SPACe helpdesk](../../contact.md). Once this has been done the app will be accessible at `https://localhost:3939` by all users listed in the configuration file and belonging to the same `group`.
### Adding the app to the rshiny-proxy configuration
For the production service the app creator has to add the following information when contacting the [SPACe helpdesk](../../contact.md):
| Info | Description |
| :----------------------: | ------------------- |
| Id| Name of the docker image , run `docker images` to [check](#check-your-docker-image) what you as developer. above |
| Display-name | display name of the app on the landing page, developer's choice |
| Description | Description which shows below the display name on the landing page, developer's choice |
| Container-cmd | `["R", "-e", "::run('/root//',host='0.0.0.0',port=3838)"]` Technical details about the app, rmarkdown, etc., look in your Dockerfile what you used
| Container-image | Name of the docker image `` |
| Access-groups | Which group(s) should be allowed to view the app and interact with it (see [here](#how-to-make-apps-visible-t-ocertain-users-only) |
## What's different when you use the 'flexdashboard' package/rmarkdown
In the following we assume there is an app consisting of one file 'flexdashboard.Rmd' (you can name it anything you like plus the extension '.Rmd'), which is to be deployed from the dev-VM and later from the production/live VM.
[Follow the app deployment instructions](#where-to-put-your-app), only this time the file 'flexdashboard.Rmd' will be in the *same* directory as the Dockerfile.
[Configure docker](#configuring-docker), with the following differences
- the name after the COPY command has the extension 'Rmd'
- the syntax of the last line is slightly different
Text Only
CMD  R -e "rmarkdown::render('flexdashboard.Rmd')"
# copy the app to the image
RUN mkdir /root/<username>
COPY flexdashboard.Rmd /root/<username>/flexdashboard.Rmd


EXPOSE 3838

CMD ["R", "-e", "rmarkdown::run('/root/<username>/flexdashboard.Rmd',shiny_args = list(port = 3838, host='0.0.0.0')"]
[Run docker](#running-docker) with the modified command `docker build -t flexdashboard .`.
Then [follow](#check-your-docker-image) the remaining steps and let the [SPACe helpdesk](../../contact.md) know that it is a flexdashboard app.
## The Dockerfile Template
Text Only
FROM openanalytics/r-base

LABEL maintainer="Name, Email address"

RUN apt-key adv --keyserver keyserver.ubuntu.com --recv-keys E298A3A825C0D65DFD57CBB651716619E084DAB9

# system libraries of general use
RUN apt-get update && apt-get install -y \
    sudo \
    pandoc \
    pandoc-citeproc \
    libcurl4-gnutls-dev \
    libcairo2-dev \
    libxt-dev \
    libssl-dev \
    libssh2-1-dev \
    libssl1.1

# system library dependency for the myappname app
RUN apt-get update && apt-get install -y \
    libmpfr-dev

# basic shiny functionality
RUN R -e "install.packages(c('shiny', 'rmarkdown'), repos='https://cloud.r-project.org/')"

# install dependencies of the myappname app
RUN R -e "install.packages('dygraphs', repos='https://cloud.r-project.org/')"
RUN R -e "install.packages('stringr', repos='https://cloud.r-project.org/')"

# copy the app to the image
RUN mkdir /root/<username>
RUN mkdir /root/<username/myappname
COPY myappname /root/<username>/myappname

EXPOSE 3838

CMD ["R", "-e", "shiny::runApp('/root/<username>/myappname',host='0.0.0.0',port=3838)"]
**Notes on docker configuration commands**
- A parent image is the image that your image is based on. It refers to the contents of the FROM directive in the Dockerfile. Each subsequent declaration in the Dockerfile modifies this parent image. Most Dockerfiles start from a parent image, rather than a base image.
- COPY This command copies a file from your host OS to the docker container
- RUN builds your application
- CMD is used to run a command as soon as a container is launched. It is different from RUN as RUN is used at the time of building an image.
- EXPOSE this command is used to specify the port number upon which the container is running its process for networking with the outside world (your host). #usage: EXPOSE [port]
## Choose your version for specific R-libraries
Assume you would want to use a specific version of the R-library `stringr`, version 1.3.0 in this example.
The Dockerfile template file have to be changed accordingly:
Text Only
# Install dependencies of the myappname app
RUN R -e "install.packages('dygraphs', repos='https://cloud.r-project.org/')"
RUN  R -e "install.packages('remotes', repos='https://cloud.r-project.org/');library(remotes);remotes::install_version('stringr', version = '1.3.0', repos='https://cloud.r-project.org/')"
## Choose your version of R
For shiny-proxy, the desired version of R can be accessed from within the Dockerfile. As a prerequisite [`Rocker`](https://github.com/rocker-org/rocker/wiki) has to be installed from within the Dockerfile.
This image allows specifying the R version in the docker tag:
Text Only
# Install R version 3.6
#FROM openanalytics/r-base
FROM "rocker/r-ver:3.6.3"

LABEL maintainer="Name, Email address"

#RUN apt-key adv --keyserver keyserver.ubuntu.com --recv-keys E298A3A825C0D65DFD57CBB651716619E084DAB9

# System libraries of general use
...
Please speak to the [SPACe helpdesk](../../contact.md) for further information.
R Versions and package versions TBD
## Install packages from github
You can install github packages. Assume your repository is `https://github.com/` you add the following lines into Dockerfile:
Text Only
...
RUN R -e "install.packages('remotes', repos='https://cloud.r-project.org/')"
RUN R -e "remotes::install_github('myrepo/myfiles')"
...
## How to work on an app as a group
Data analysts who want to collaborate on a project in a shared directory. Ask/email to request
- The creation of a new shared directory, providing the directory/project name `` to be used and the usernames `` of all people to get access to this new shared directory
- New users with `` to be added to an existing shared directory in `/home/shared`
- Existing users with `` to be removed from an existing shared directory in `/home/shared`
## Using Rstudio
In case you want to work on your app using RStudio on the dev-VM.
Note that RStudio is not needed for the deployment of the app on the shiny server.
*[AWB]: Analytical Workbench
*[CLI]: Command-line interface
*[CPU]: Central processing unit; used throughout this site as a catch-all term for computer processing power
*[CRAN]: The Comprehensive R Archive Network
*[EIDF]: Edinburgh International Data Facility
*[gateway]: The initial log-in page for the Analytical Workbench services
*[Gateway]: The initial log-in page for the Analytical Workbench services
*[Guacamole]: The initial log-in page for the Analytical Workbench services
*[HTML]: Hyper Text Markup Language
*[MS]: Microsoft
*[OS]: Operating system
*[PDF]: Portable Document Format
*[pip]: A package management and installation system for Python
*[Pip]: A package management and installation system for Python
*[RDP]: Remote Desktop Protocol; used throughout this site to refer to the graphical user interface for the virtual machines
*[SG]: Scottish Government
*[SPACe]: Scottish Public Sector Analytical Collaborative
*[SSH]: Secure Shell Protocol; used throughout this site to refer to the command-line interface for the Linux virtual machines
*[VM]: Virtual machine
*[VMs]: Virtual machines
*[VPN]: Virtual private network
*[VPNs]: Virtual private networks
*[W3C]: World Wide Web Consortium
*[WCAG]: Web Content Accessibility Guidelines